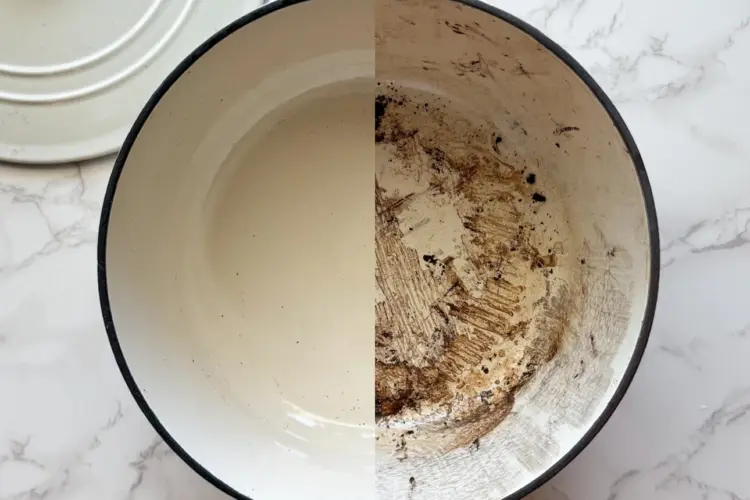
If your enamel Dutch oven is looking a little worse for wear, don’t fret. Whether you use it for soups, braises, or baking sourdough bread, stains and burn marks are bound to happen. You don’t need a complicated cleaning routine to get those stubborn burn stains off! My method for how to clean an enamel Dutch oven requires one simple tool and can get white enamel Dutch ovens looking new again in minutes!
How to Remove Stains and Burn Marks from an Enamel Dutch Oven
I’ve owned enamel Dutch ovens for years, and made countless loaves of sourdough bread in them. With that much use, my Dutch ovens sometimes need a little extra love and care. I’ve tried just about every cleaning method you can find online for how to clean an enamel Dutch oven — from boiling solutions of hydrogen peroxide to scrubbing with homemade pastes of vinegar and baking soda. While some of those worked for me, they took a lot of time, and usually left me with a mess to clean up afterwards. Through trial and error, I found a much easier method that works for removing stains and burn marks from both the inside and the outside of my enamel Dutch ovens. My secret: a Magic Eraser (or any brand of melamine sponge).
Whether you’re a marathon bread-baker or you enjoy long braises, this method is simple and removes enamel stains like magic! Those burnt on stains and stubborn brown rings wont stand a chance. Plus, who doesn’t love using Magic Erasers? Below are the exact steps I follow to get my enamel Dutch ovens looking clean and bright again!
What you’ll need to Clean an Enamel Dutch Oven
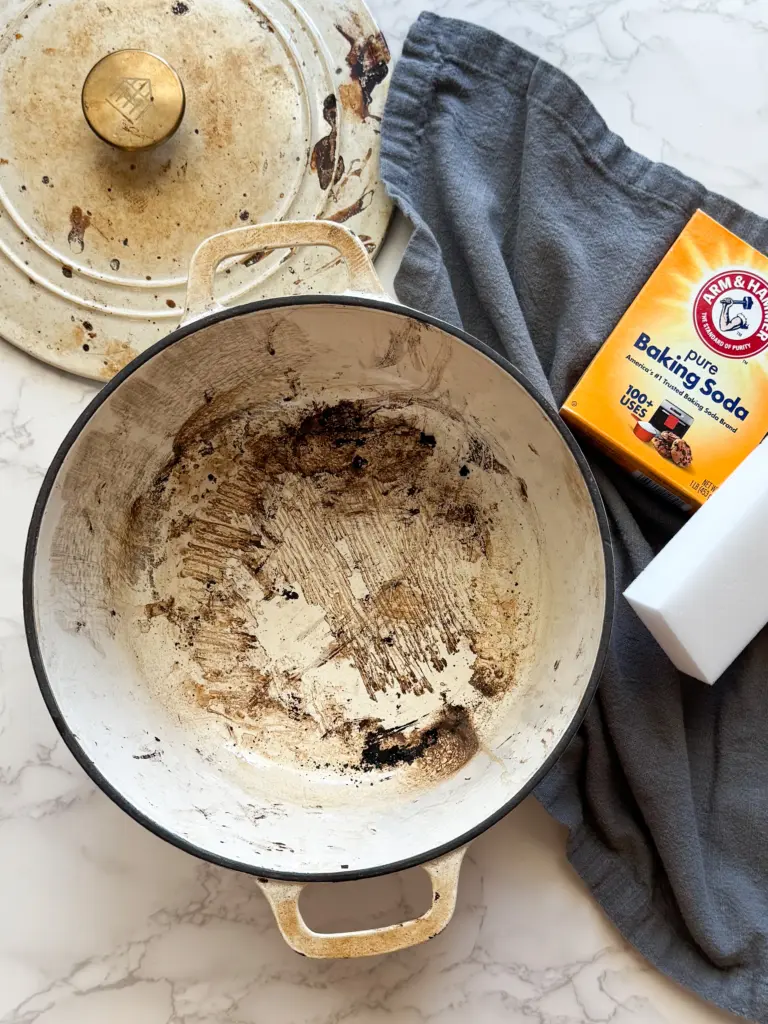
- A worse for wear Enamel Dutch oven
- Melamine Sponge (name brand or generic)
- Hot water
- Optional: baking soda, mild dish soap, microfiber towel, gloves
Time & difficulty
- Time: 60–75 minutes (mostly soak time)
- Difficulty: Easy
Step-by-Step Instructions
1. Pre-soak the Dutch oven
Fill your sink with hot water and, if desired, add a drop of mild dish soap or baking soda. Submerge both the pot and the lid with the enamel side facing up. Soak for about 1 hour — this helps soften burnt-on residue so it lifts away more easily.
2. Prep the Magic Eraser
Wet the melamine sponge and squeeze out any excess water. Melamine foam is a micro-abrasive material that works like ultra-fine sandpaper, breaking down stains without the need for boiling solutions or DIY scrubs.
3. Clean the interior enamel
Drain the sink. Using light, even pressure, scrub the interior in small circles, paying extra attention to stained rings or darkened corners. Rinse occasionally to check your progress. Avoid aggressive pressure—let the sponge do the work.
4. Clean the exterior enamel
Repeat the process on the outside of the Dutch oven and lid. Be gentle around metallic logos, decals, or decorative trim — use the edge of the sponge to work in tight spots like underneath the handles and rims.
5. Rinse thoroughly
Rinse with warm water to wash away any loosened residue and melamine foam particles. If needed, repeat soak and do a second pass with the sponge for any remaining stains.
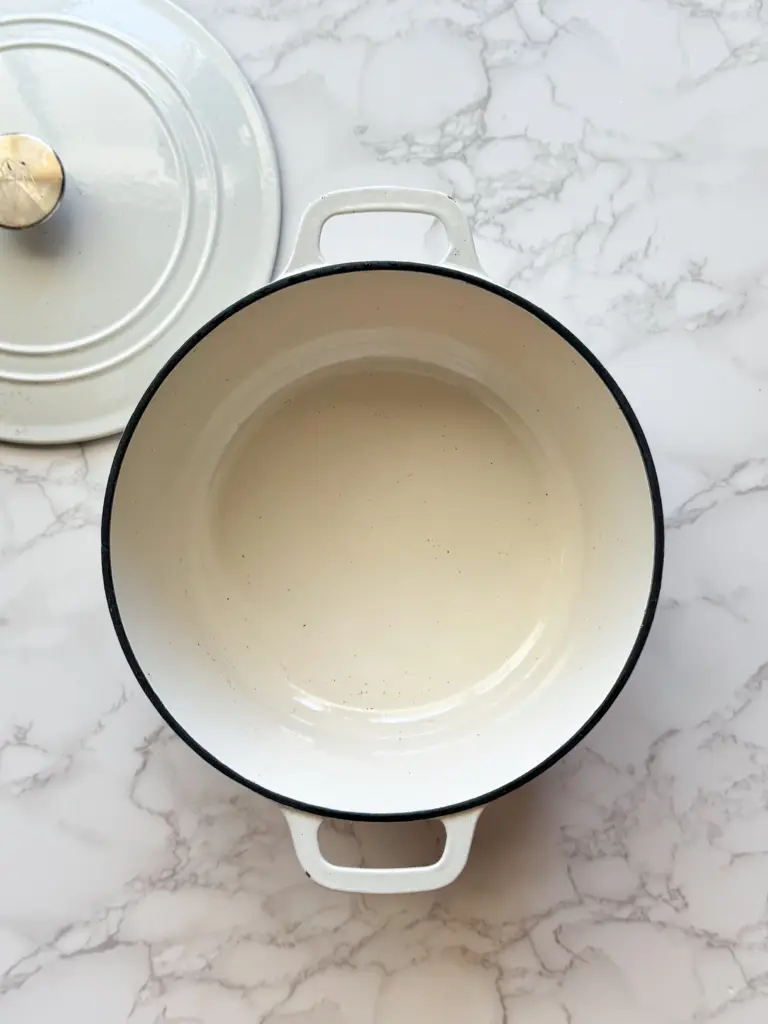
6. Final wash and dry
Give everything a quick wash with mild dish soap and a soft sponge, then dry with a microfiber towel to prevent water spots. Your enamel should look bright and clean—inside and out.
How to Clean an Enamel Dutch Oven Safety & FAQ
- How does it work? A Magic Eraser is made from melamine foam, a micro-abrasive material that works like ultra-fine sandpaper. When damp, it can gently lift away stubborn discoloration, burnt-on residue, and yellowing without mixing DIY pastes or boiling solutions.
- Will a Magic Eraser scratch enamel? In my experience, melamine sponges are safe for enamel Dutch ovens when used gently. Melamine foam is mildly abrasive but far less abrasive than traditional scouring pads. If you want to clean burnt enamel Dutch oven surfaces quickly and with minimal effort, this is one of the easiest and most effective methods you’ll find. Remember to avoid heavy pressure and skip raw cast iron, nonstick interiors, or high-gloss decals.
- What if the stains are really tough to get off? If you have deep stubborn stains that don’t loosen with a hot water soak alone, you can add 1/4 cup of baking soda to the water before cleaning. Baking soda is alkaline, helping to break down burnt on stains and discoloration, making it easier for the Magic Eraser to lif them away. While I don’t always add baking soda, it can be helpful for older stains and heavily browned areas without harming the enamel.
- Maintenance tip: Clean your Dutch oven promptly after every use with warm soapy water and a soft sponge. This keeps stains from setting, so you’ll need the Magic Eraser less often!
Your Dutch Oven Is Ready to Bake Again
Now that your enamel Dutch oven looking refreshed and new again, it’s ready to get back to work in the kitchen. Whether you’re simmering soups, slow-braising meats, or baking sourdough bread, a well cared for pot will serve you for years to come. If you’re ready to try baking bread in yours, try out my sourdough bread recipe, where I walk you through the process of making sourdough bread step-by-step. Pulling a fresh loaf of sourdough out of a well polished Dutch oven is absolutely a vibe.
