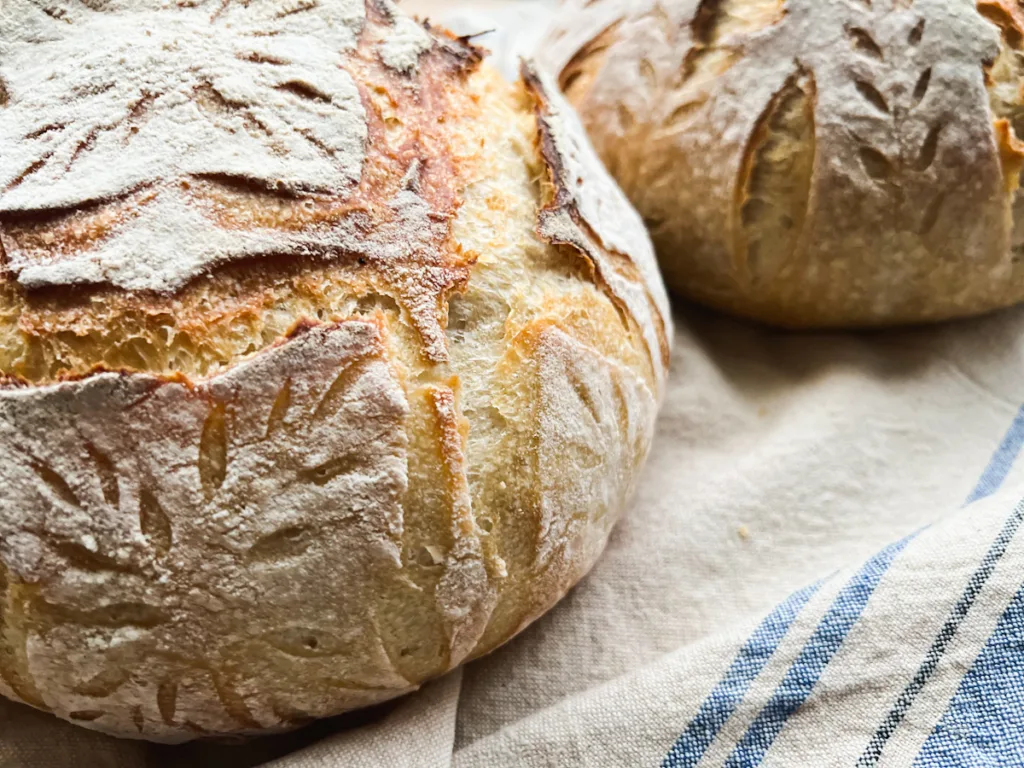
Are you wanting to learn how to bake sourdough bread? The first step to baking great bread is an active sourdough starter. This guide will teach you how to make a sourdough starter from scratch in as little as 8 days, and give you tips for maintaining your new starter.
If you’ve found yourself curious about sourdough you are in the right place! In order to start making your own naturally leavened baked goods at home you will need a sourdough starter. Making a homemade starter can seem intimidating but trust me when I say it’s easier than you think. Making one requires only flour, water, and a bit of patience. With this guide, you can have your very own starter ready to make bread in a little over a week.
Jump Too
- What is Sourdough?
- What is a Sourdough Starter?
- Tools and Ingredients
- How to Make a Sourdough Starter: Day-by-Day
- How do I Know When my Starter is Ready?
- What Can I do with Sourdough Discard?
What is Sourdough?
Sourdough is bread made with wild yeast. People have been baking bread for millenniums and until the invention of commercial yeast in the mid-1800’s, bread was leavened using wild naturally occurring yeast.
The name sourdough comes from the very distinct sour flavor that naturally leavened bread has. This sour flavor is a result of beneficial bacteria that live in your sourdough starter with the wild yeast. These bacteria are also responsible for the many health benefits of sourdough bread, and are what set it apart from commercial yeast.
Sourdough has many health benefits and can be a great alternative for those with mild gluten sensitivities. The long fermentation and beneficial bacteria break down much of the gluten, making sourdough much easier to digest and more nutrient and antioxidant rich. Sourdough also acts as a prebiotic and can be great for improving digestive issues and overall gut health.
Let’s Get Started
What is a Sourdough Starter?
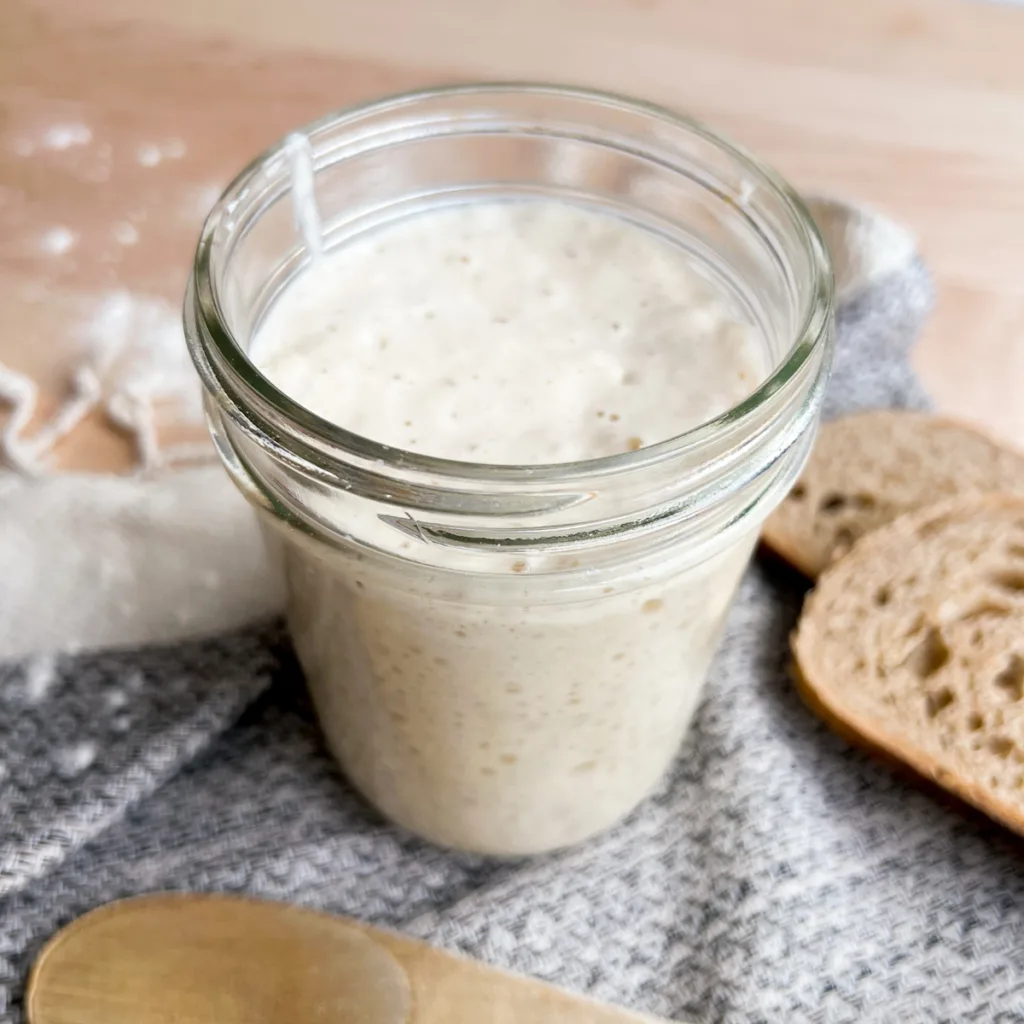
Starter is a live yeast culture that you maintain and use to leaven sourdough baked goods. In short, it’s a jar of wild yeast that you keep alive to bake with. You keep your sourdough starter alive with regular feedings of flour and water. The water in a sourdough starter provides moisture and creates an ideal environment for the yeast to live. The flour feeds the yeast and bacteria living in your starter allowing them to multiply. This sloppy mixture of wild yeast, bacteria, water and flour is used in sourdough recipes to leaven them.
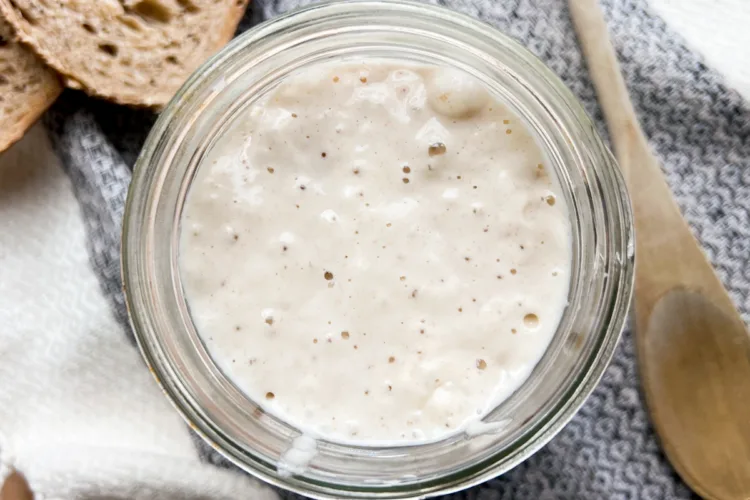
Once you have an established sourdough starter, you will notice it rises and falls between feedings. This rising action is due to the yeast and bacteria feeding off the flour and multiplying. When they multiply, they release gases, which get trapped in the sticky flour and water mixture, causing it to rise and giving it it’s iconic bubbly look.
Where Does the Yeast in Sourdough Starter Come From?
I like to think of making a sourdough starter as the act of harvesting yeast. There is wild yeast all around us. It is in our kitchens, on our hands and in our food. You can’t see it, but its all around you. Majority of the yeast you are harvesting when making a sourdough starter comes from the flour you are using. For this reason, it is incredibly important to pick a high-quality unbleached flour.
How Long Does it Take to Make a Sourdough Starter?
Making a starter at home takes patience and persistence. Most sourdough starters will be ready within a week, but some may take longer. How long it takes to harvest the yeast depends on factors such as; the quality of your flour, purity of your water, temperature of your home, and other environmental factors. If the process takes longer than expected, don’t give up.
Don’t Want to Make a Starter?
No problem! If you don’t feel like making your own starter you can always purchase a one. Dehydrated starters purchased online can be rehydrated and active in just a few days, making them great for those looking to save time. A reliable place to purchase starter online is on Etsy.
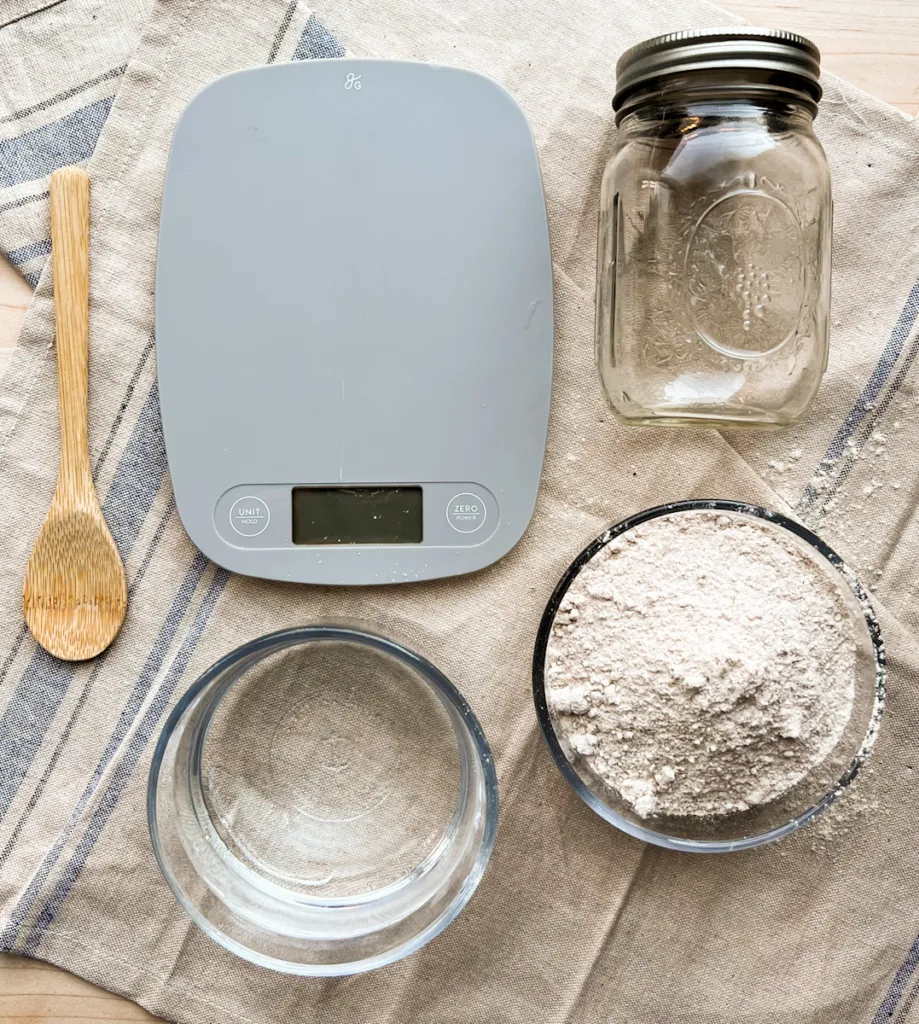
Tools and Ingredients
- Kitchen Scale: You can use the measurement option in this guide to get your starter going, but I do recommend you get a kitchen scale at some point during your sourdough journey. Majority of the sourdough recipes you will encounter, including many of my own, are written in weighted measurements for accuracy.
- Rubber Spatula or Spoon: Choose a utensil that will easily fit into the opening of your jar for stirring.
- Clean Jars: I recommend having more than one jar on hand so that with each feeding you can transfer your starter to a clean and sterile jar. Wide mouth jars make stirring your starter and scraping the sides much easier.
- Organic Whole Wheat Flour: We use whole wheat flour to speed up the process of making our starter. Wild yeast lives on surfaces all around us, especially out in nature. Whole wheat has the bran, outer shell of the wheat berry, intact. That means there is more yeast present in the flour for us to harvest from.
- Organic All-Purpose Flour or Bread Flour: Once you get your starter active, you can begin feeding it all-purpose flour or bread flour for cheaper maintenance. Pesticide residue in conventional flour can kill off the yeast in your starter, so choose a quality organic flour when working with sourdough.
- Water: Always use filtered water or spring water when working with sourdough. Chlorine in tap water can kill off the yeast in your starter.
- Rubber Bands: Marking the outside of your jar with either a marker or a rubber band will help you determine how much your starter is rising after each feeding.
How to Make a Sourdough Starter: Day-by-Day
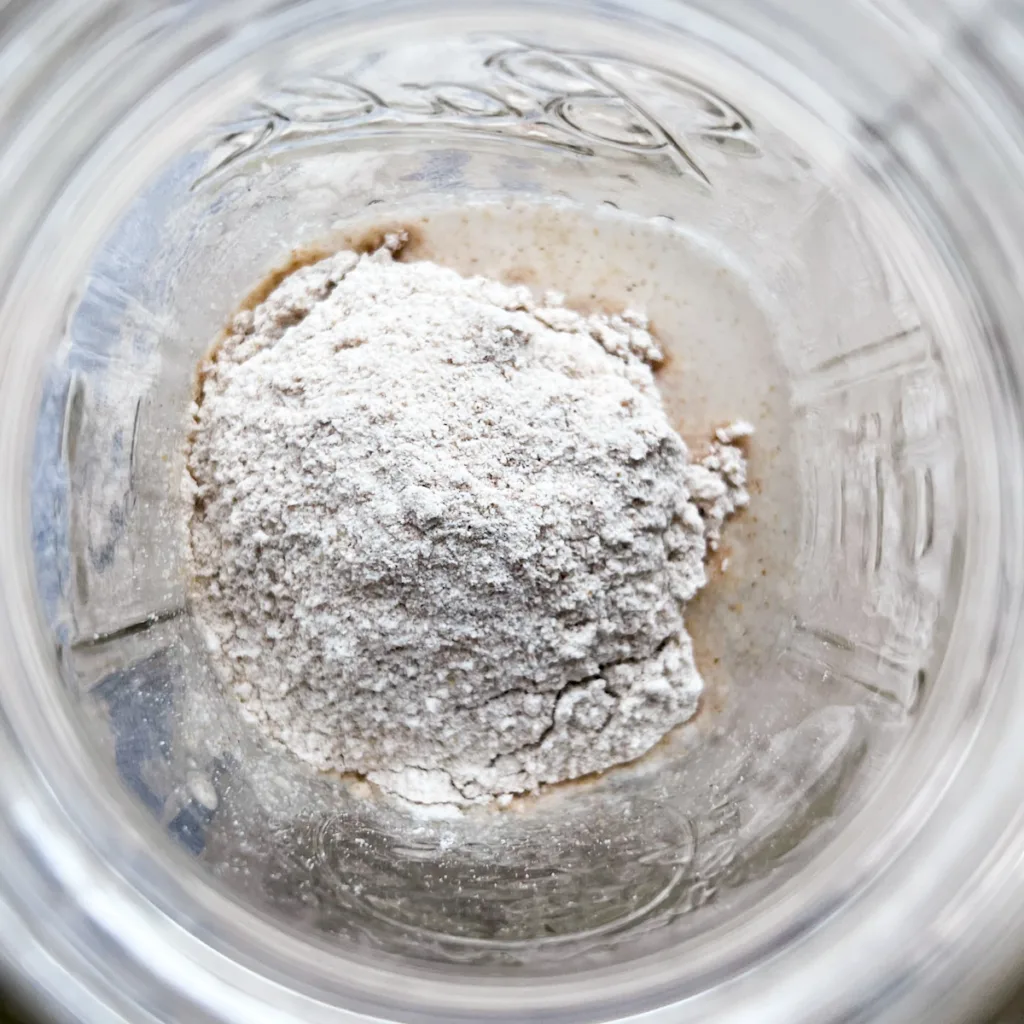
Day 1:
In a small, clean, wide mouth jar, mix together:
- 3 tablespoons filtered water (40g)
- 1/4 cup scooped and leveled whole wheat flour (40g)
Stir everything together until no dry bits of flour remain and it is thick and pasty. Once fully mixed, place a lid loosely on your jar. You want your lid to be tight enough to prevent any dust or insects from getting into your jar, but loose enough that the gases your starter produces can escape. Leave your new starter to set at room temperature for 24 hours.
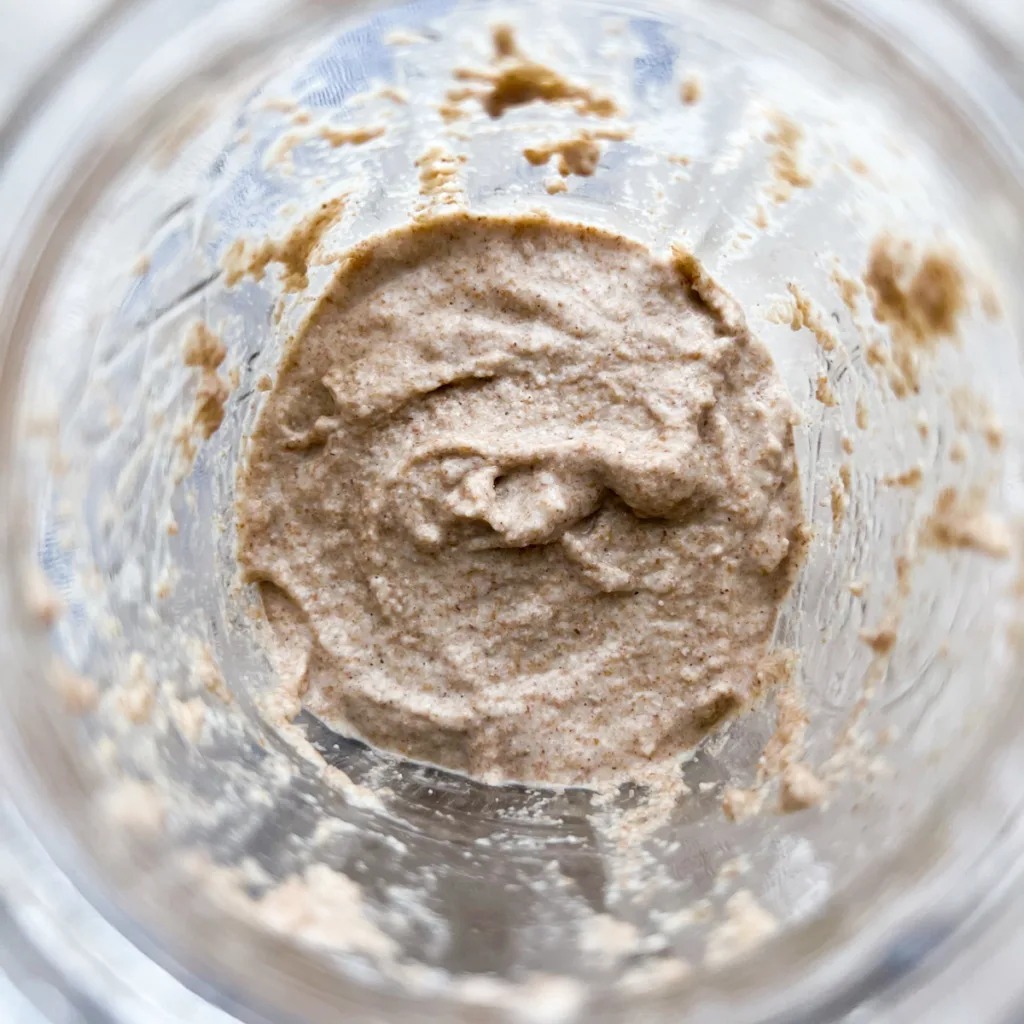
Day 2-4:
For the next few days, at the same time each day, you will want to transfer some of your starter to a clean jar and feed it.
- 2 overflowing tablespoons of starter (40g)
- 3 tablespoons filtered water (40g)
- 1/4 cup scooped and leveled whole wheat flour (40g)
Throw out any remaining starter from the day before. You will not want to keep any discard until your starter is fully established and there is no longer a risk for contamination.
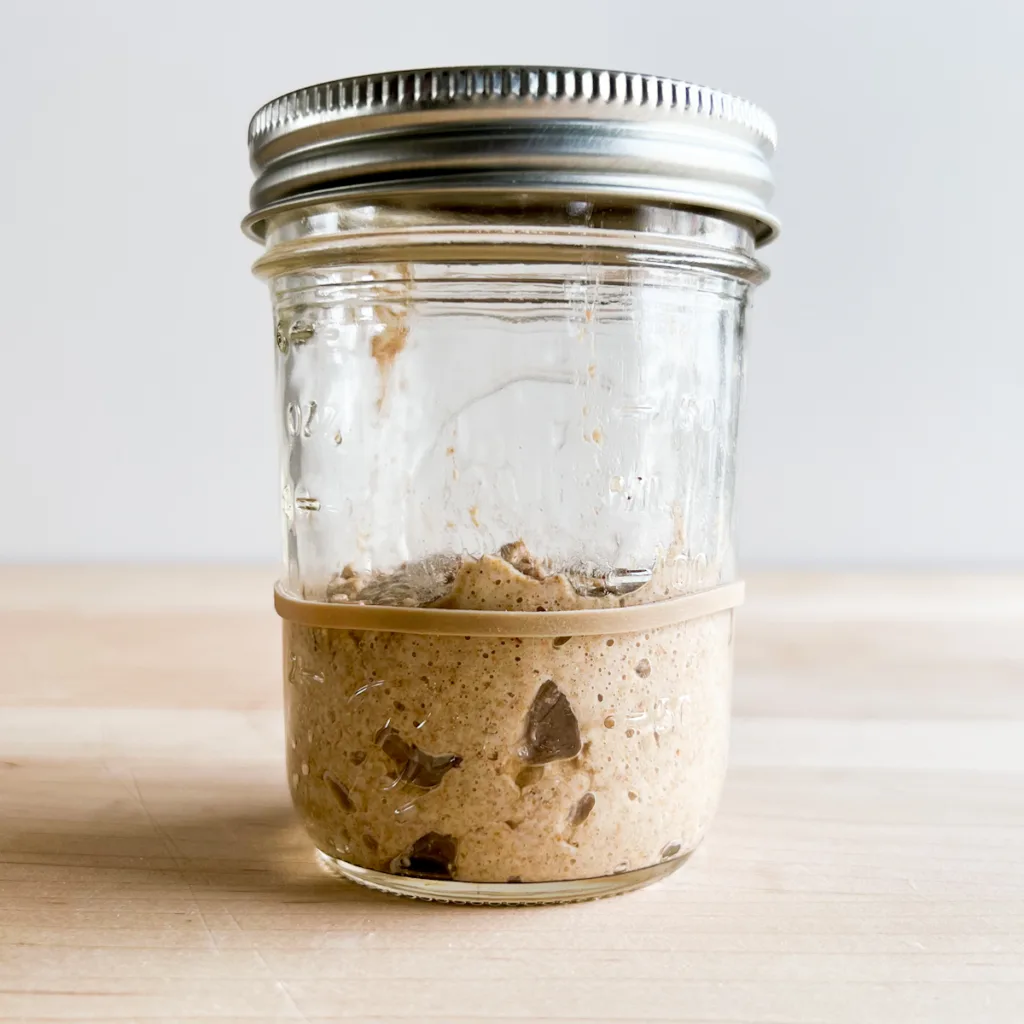
After feeding, place a lid loosely on your jar and put a rubber band around the outside to mark the height of your starter. Leave your starter to set at room temperature. By day 3 you may begin to see activity and using a rubber band will help you determine how much your starter is growing.
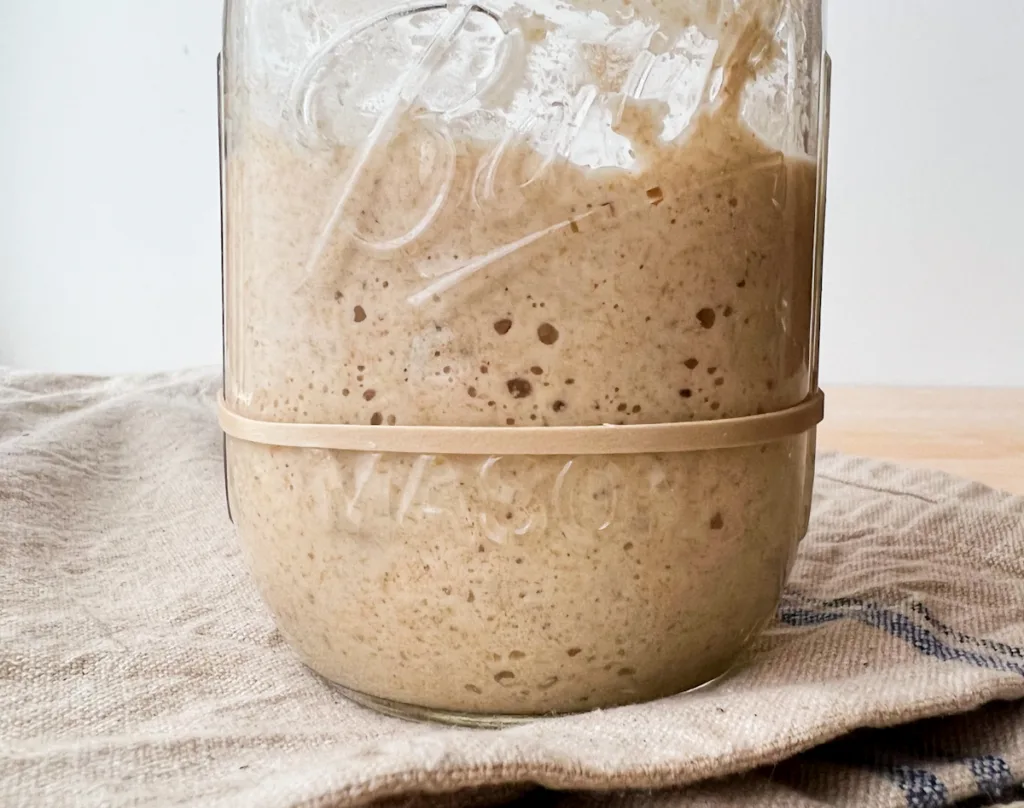
Day 5-7:
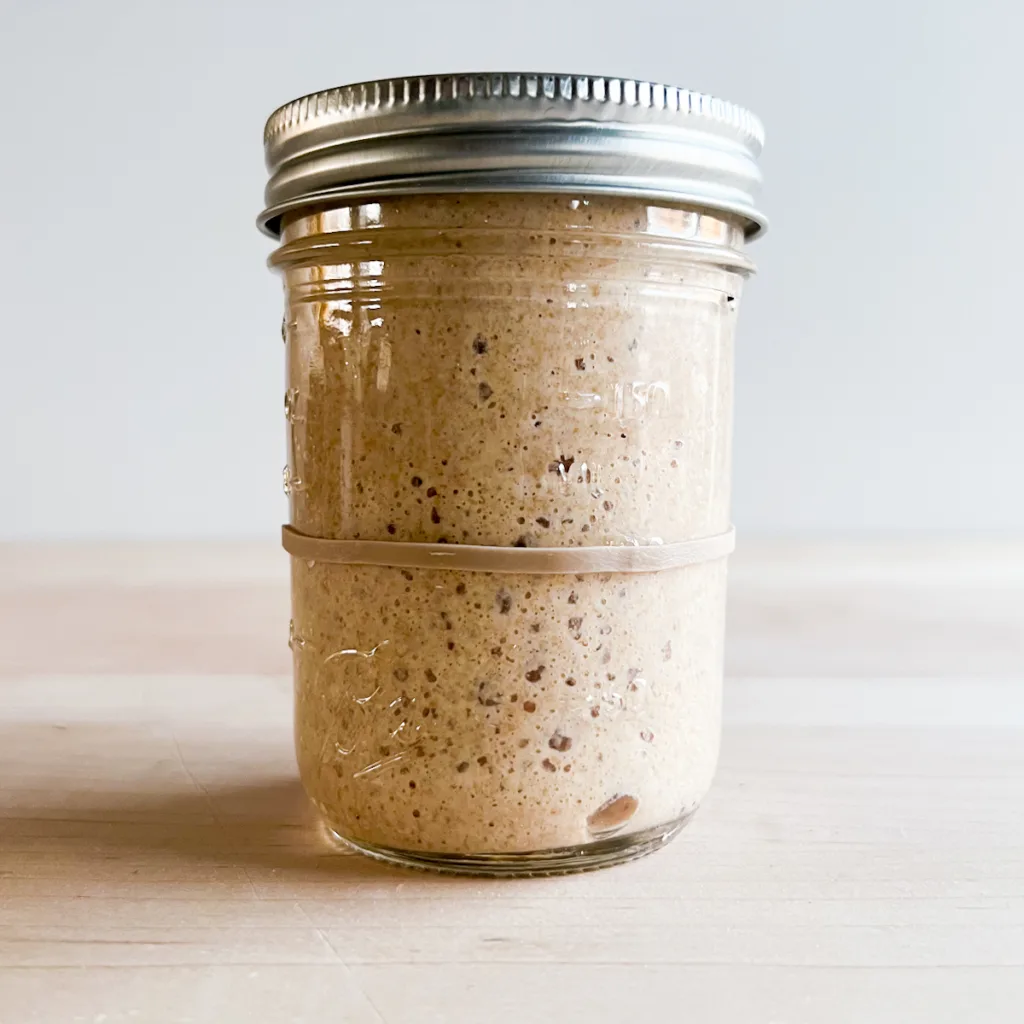
By day 5 you should begin to see signs of life. Your starter will begin to develop an almost sweet aroma and there will be bubbles and foaming happening on the surface. Your starter may also be rising past the rubber band!
Now that we are seeing life we can cut back on the whole wheat flour and start introducing bread flour. For the next few days feed your starter;
- 2 overflowing tablespoons starter (40g)
- 3 tablespoons filtered water (40g)
- 2 tablespoons scooped and leveled whole wheat flour (20g)
- 2 tablespoons scooped and leveled bread flour (20g)
Day 8 and on:
By the eighth day, your starter should be ready to use! It’s time to give it a name, because every starter should have a name. Mine is named Danny Doughvito. Now that it’s ready you can stop feeding it whole wheat and switch to 100% bread flour feedings. If it’s not ready continue feeding it the same way you did for day 5-7 until it is.
How do I Know When My Sourdough Starter is Ready to Use?
Your starter is ready for baking when it is reliably doubling in size between feedings, has a yeasty almost sour aroma, and passes the float test. To float test your starter simply take a spoonful when its at peak and drop it into a glass of water. If it floats, its ready!


How do I Maintain my Sourdough Starter?
When your sourdough starter begins to deflate and fall it is because the yeast and bacteria have eaten up all the starch in the flour and cannot continue to multiply. This lets you know that it is time to feed your sourdough starter. Depending on your starter and environment, once it is established you will need to feed it every 12-24 hours.
Other signs your starter needs to be fed include; the smell becoming stronger and more acidic, and sometimes a layer of liquid on top called hooch. Hooch is a byproduct of fermentation and indicates that your starter is really hungry. If you see hooch on your starter simply pour it off and feed your starter as normal. Avoid feeding your starter before its hungry. Feeding it before it peaks and falls will weaken the colony of yeast.
If feeding your starter this often doesn’t fit into your schedule, you can keep it in the fridge for less frequent feedings. To store your starter in the fridge simply feed it before hand and pull it out to feed 8-16 hours before your next bake. Your starter can be left in the fridge without any maintenance for up to two weeks.
How do I use Sourdough Starter?
When using starter in a recipe you want to use it when it’s at or just past its peak. Your sourdough starter is at its peak when it has at least doubled in size. Using starter when it is at peak and up to two hours after it begins to fall ensures you’re getting the most yeast to use for baking.
To use your sourdough starter in a recipe feed it enough flour and water to accommodate your recipe about 8-16 hours before you plan to bake. When it’s at its peak simply scoop it from its jar to weigh or measure it. Simple as that!
What Can I do with Sourdough Discard?
Once your starter is established it is safe to keep your discard to use in discard recipes. Store your discard in a separate jar and keep it in the fridge. Some great discard recipes to try are Discard Crepes, Discard Chocolate Chip Cookies, and Discard Chicken and Dumplings.
My Favorite Sourdough Recipes for Beginners

How to Make a Sourdough Starter
30
minutes8
days1
sourdough starterThe first step to baking great bread is an active sourdough starter. This guide will teach you how to make a sourdough starter from scratch in as little as 8 days.
Ingredients
- Days 1-4
40 g filtered or spring water (3 tbs)
40 g whole wheat flour (loose 1/4 cup)
- Day 5-7
40 g water (3 tbs)
20 g whole wheat flour (2 tbs)
20 g bread flour (2 tbs)
- Day 8
40 g water (3 tbs)
40 g bread flour (loose 1/4 cup)
Directions
- Getting Started:
- Before you begin make sure you have a few jars with lids on hand and a utensil for stirring that will easily fit in the opening of your jar. You can use the measurement option in this guide to get your starter going, but I do recommend you get a kitchen scale at some point during your sourdough journey. Majority of the sourdough recipes you will encounter, including many of my own, are written in weighted measurements for accuracy.
- Day 1:
- In a small, clean, wide mouth jar, mix together;
- 3 tablespoons filtered water (40g)
- 1/4 cup scooped and leveled whole wheat flour (40g)
Stir everything together until no dry bits of flour remain and it is thick and pasty. Once fully mixed, place a lid loosely on your jar. You want your lid to be tight enough to prevent any dust or insects from getting into your jar, but loose enough that the gases your starter produces can escape. Leave your new starter to set at room temperature for 24 hours.
- Day 2-4:
- For the next few days, at the same time each day, you will want to transfer some of your starter to a clean jar and feed it.
- 2 overflowing tablespoons of starter (40g)
- 3 tablespoons filtered water (40g)
- 1/4 cup scooped and leveled whole wheat flour (40g)
Throw out any remaining starter from the day before. You will not want to keep any discard until your starter is fully established and there is no longer a risk for contamination.
After feeding, place a lid loosely on your jar and put a rubber band around the outside to mark the height of your starter. Leave your starter to set at room temperature - Day 5-7:
- By day 5 you should begin to see signs of life. Your starter will begin to develop an almost sweet aroma and there will be bubbles and foaming happening on the surface. Your starter may also be rising past the rubber band!
Now that we are seeing life we can cut back on the whole wheat flour and start introducing bread flour. or the next few days feed your starter;
- 2 overflowing tablespoons of starter (40g)
- 3 tablespoons filtered water (40g)
- 2 tablespoons scooped and leveled whole wheat flour (20g)
- 2 tablespoons scooped and leveled bread flour (20g)
- Day 8 and on:
- By the eighth day, your starter should be ready to use! It’s time to give it a name, because every starter should have a name. Mine is named Danny Doughvito. Now that it’s ready you can stop feeding it whole wheat and switch to 100% bread flour feedings. If it’s not ready continue feeding it the same way you did for day 5-7 until it is.
- How to Tell if my Starter is Ready:
- Your starter is ready for baking when it is reliably doubling in size between feedings, has a yeasty almost sour aroma, and passes the float test. To float test your starter simply take a spoonful when its at peak and drop it into a glass of water. If it floats, its ready!
Notes
- Majority of the yeast you are harvesting when making a sourdough starter comes from the flour you are using. For this reason, it is incredibly important to pick a high-quality unbleached flour.
- Most sourdough starters will be ready within a week, but some may take longer. How long it takes to harvest the yeast depends on factors such as; the quality of your flour, purity of your water, temperature of your home, and other environmental factors. If the process takes longer than expected, don’t give up.
- When your sourdough starter begins to deflate and fall it is because the yeast and bacteria have eaten up all the starch in the flour and cannot continue to multiply. This lets you know that it is time to feed your sourdough starter. Depending on your starter and environment, once it is established you will need to feed it every 12-24 hours.
- Signs your starter needs to be fed include; the smell becoming stronger and more acidic, and sometimes a layer of liquid on top called hooch. Hooch is a byproduct of fermentation and indicates that your starter is really hungry. If you see hooch on your starter simply pour it off and feed your starter as normal.
- Avoid feeding your starter before its hungry. Feeding it before it peaks and falls will weaken the colony of yeast.
- You can keep your starter in the fridge for less frequent feedings. To store your starter in the fridge simply feed it before hand and pull it out to feed 8-16 hours before your next bake. Your starter can be left in the fridge without any maintenance for up to two weeks.
- To use your sourdough starter in a recipe feed it enough flour and water to accommodate your recipe about 8-16 hours before you plan to bake. When it’s at its peak simply scoop it from its jar to weigh or measure it.
Did you make this recipe?
Tag @madeinmotherood on Instagram and hashtag it with #madeinmotherhood
Like this recipe?
Follow @madeinmotherhood on Pinterest

On days 5-7 should you still be adding it to a clean jar?
Hey Lauren! Yes, with each new feeding try to transfer your starter to a new jar. I keep two weck jars so that I can always have a clean one on hand.
Awesome thank you! Your recipe has been the best to follow and most successful for me! 🙂
I love to hear that Lauren!
Do you have to make a new starter every time you want to make bread?
Hey Emily! You do not. Once you have an established sourdough starter, you only need to feed it to keep it active and alive!
Can you use bread flour to feed instead of wheat flour?
Hey Babs! Using bread flour will work for making a starter just as well. Whole wheat is only my preferred method but there are many ways to get your starter going without it. Keep in mind that it may take a few days longer to get going if using only bread flour.
Hey, can I use all purpose flour instead of bread flour?
Hey Leslie! All-purpose flour will work when making a sourdough starter, but it may add a few days time before you see activity.
Hi. When i leave it in the fridge for a week, do I feed it as soon as I take it out or should I wait for it to warm up? Also, if I use the starter do I feed the remaining starter as soon as I take the starter that I need to use or am I waiting the full 24 hours? If my recipe calls for half of my starter and if I am suppose to discard some I will not have any left. In this situation do I not discard?
Thanks for reaching out Lynda. I feed my starter straight from the fridge. Once your starter is established feeding it after use or at the 24 hour mark is totally based on your own personal preference. If the recipe leaves you with only enough starter to feed don’t worry about discarding.